Your First Smovape: The Complete Beginner’s Setup Guide (2026)
Welcome to the Smovape family! This guide is your friendly companion, designed to take you from unboxing your new device to enjoying your first perfect puff. This guide covers everything you need to know in simple, easy-to-follow steps. Let’s get started on your vaping journey with confidence. (Updated for 2026).
First Things First: What is a Smovape?
Before diving in, it is helpful to understand the basics. A Smovape is a personal vaporizer. These devices are designed for simplicity and great performance.
They work by heating a liquid, called e-liquid, to create a vapor that is then inhaled. This process demystifies the technology and helps build a confident start.
“Electronic cigarettes (e-cigarettes) are battery-powered devices that work by heating a liquid into an aerosol that the user inhales and exhales.” – Centers for Disease Control and Prevention (CDC)
A typical Smovape has three main parts: a battery, a coil (heating element), and a pod or tank to hold the e-liquid. When activated, the battery sends power to the coil, which heats the e-liquid absorbed in its cotton wicking material.
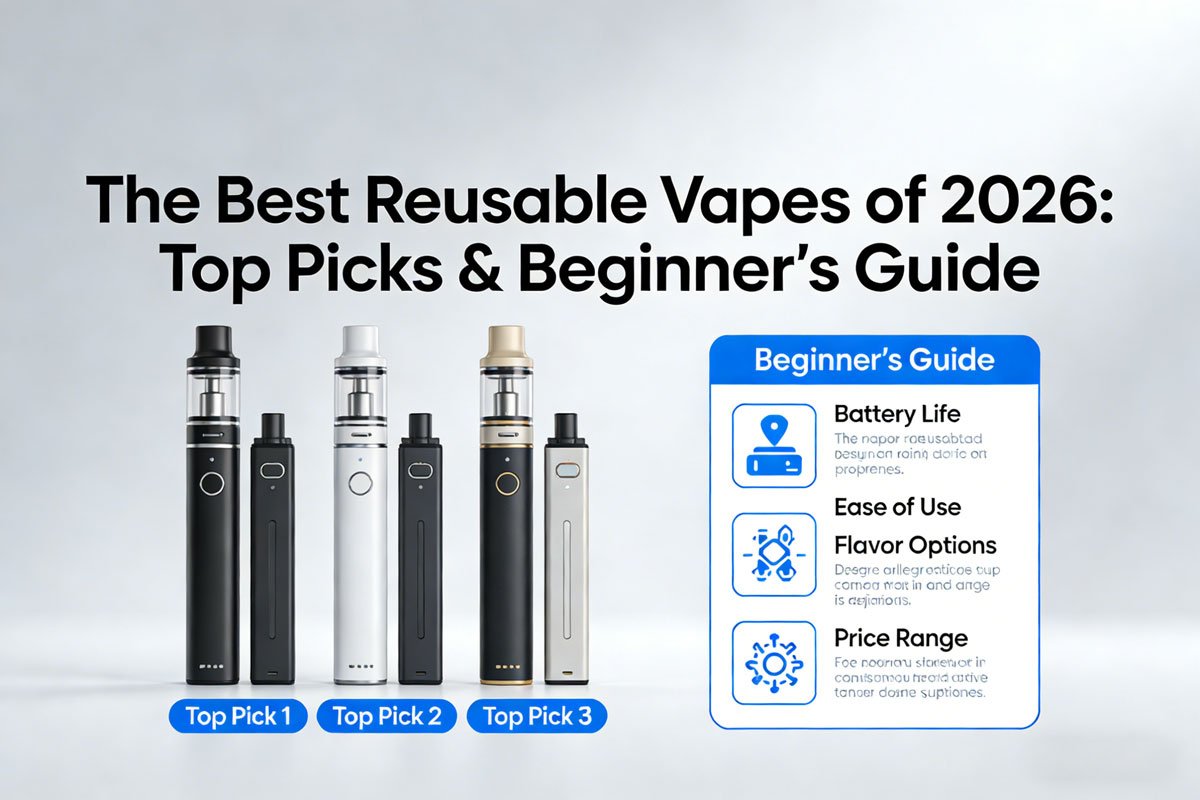
Unboxing Your Smovape: What’s Inside?
Opening the box for the first time is exciting. This section provides a checklist of every component you should find. Knowing each part helps with assembly.
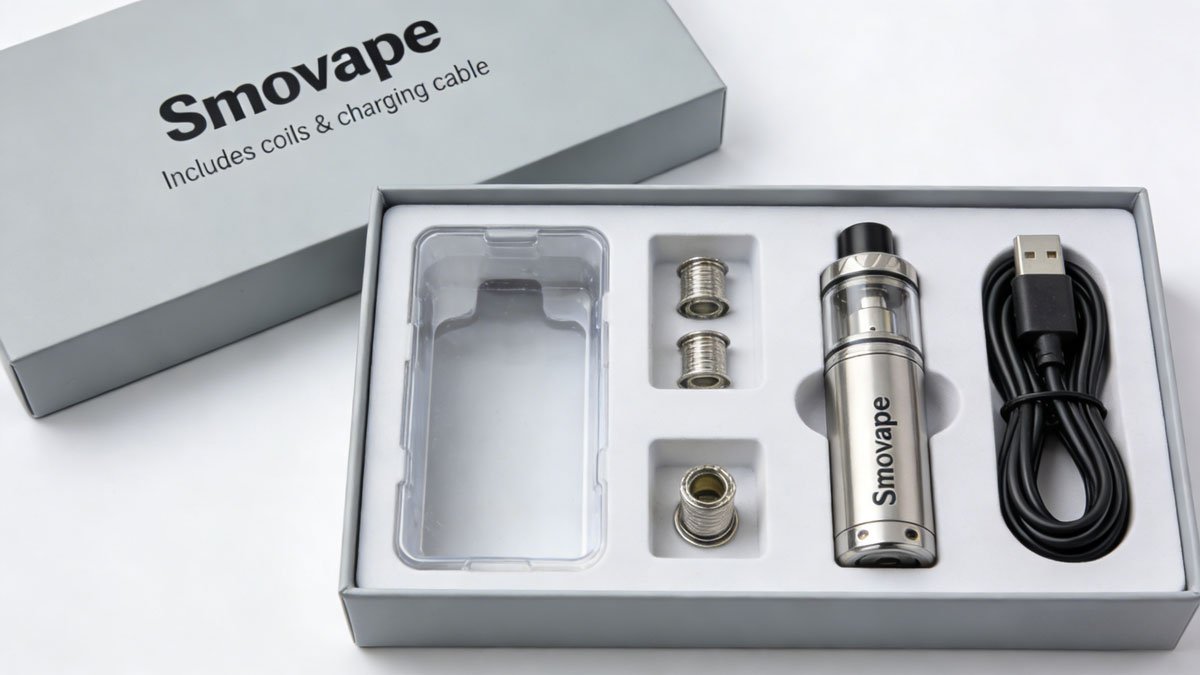
| Component | Purpose |
|---|---|
| Smovape Device (Mod/Battery) | The main body that houses the battery and chipset. |
| Pod or Tank | Holds the e-liquid and the coil. |
| Coils (usually 2) | The heating element that vaporizes the e-liquid. |
| Charging Cable (e.g., USB-C) | Used to recharge the internal battery. |
| User Manual & Warranty Card | Contains important instructions and safety information. |
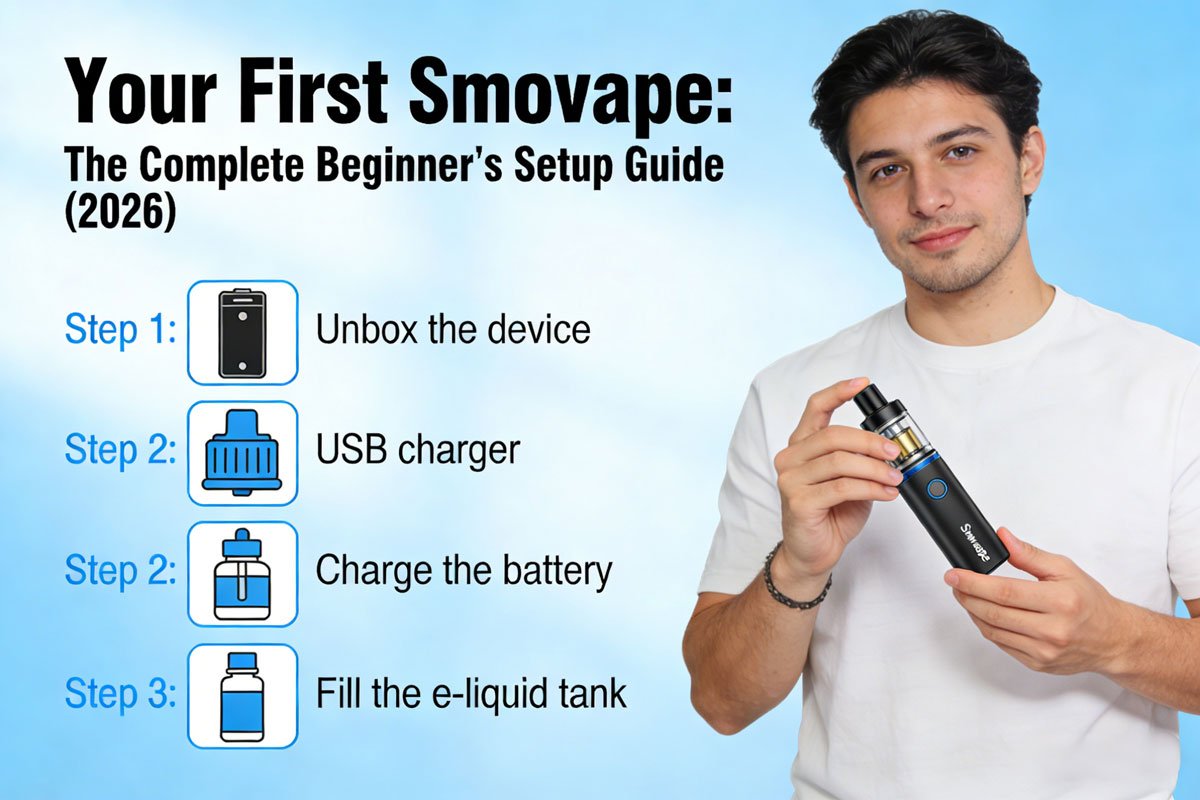
Step 1: Initial Setup & Assembly
Ready to put it all together? Following these simple steps ensures the device is assembled correctly. This is the foundation for a great vaping experience.
Charge Your Device
Before anything else, it is vital to power up. Plug the included charging cable into the device and connect it to a suitable power source. A full first charge helps calibrate the battery for optimal health.
Most devices have an indicator light that will turn green or switch off when fully charged. This usually takes 60-90 minutes.
Install the Coil
The coil is the heart of your device. Remove the pod or tank from the main body. Most modern Smovape coils use a simple push-to-fit system.
Align the coil with the opening at the bottom of the pod and press it in firmly. A secure fit is crucial to prevent leaks.
Attach the Pod or Tank
This is the final assembly step. Once the coil is installed, connect the pod or tank back to the device. Most Smovape models use strong magnets that click satisfyingly into place.
Step 2: Filling and Priming for the Perfect First Vape
This is the most important step to avoid a harsh, burnt taste. It involves filling the pod correctly and allowing the new coil to become fully saturated with e-liquid.
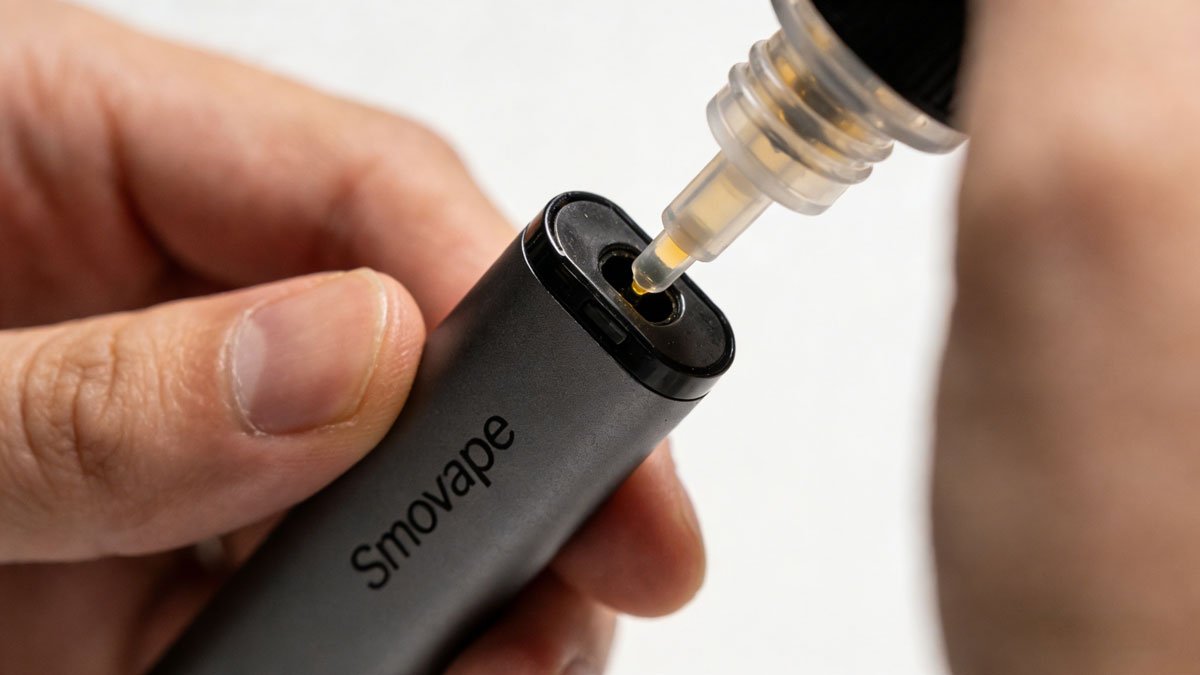
How to Fill Your Pod/Tank
Locate the rubber or silicone plug on the side or bottom of your pod. Lift this plug to reveal the fill port. Insert the nozzle of your e-liquid bottle and gently squeeze.
Fill the pod until it is about 80-90% full. Leaving a small air bubble at the top helps prevent pressure-related leaks. Securely close the plug once finished.
Why You MUST Prime Your Coil (And How to Do It)
Priming ensures the cotton wick inside the coil is fully soaked before it gets heated. Vaping with a dry wick will instantly burn the cotton, ruining the coil and creating an awful taste known as a “dry hit.”
After filling the pod for the first time with a new coil, simply let it sit upright for 5-10 minutes. This allows the e-liquid to naturally absorb into the cotton. That’s all it takes to guarantee a great first vape.
Step 3: Using Your Smovape for the First Time
You are all set up and primed. Now for the fun part. Learning the basic operations of the device will ensure a smooth and enjoyable experience from the very first puff.
Powering On/Off and Adjusting Settings
Most Smovape devices turn on and off with five quick clicks of the main button. Some draw-activated models have no button and are always ready. If your device has adjustable wattage, start at the lowest recommended setting for the installed coil.
The Right Way to Inhale: MTL vs. DTL
Different devices are designed for different inhalation styles. Knowing which style your Smovape is for is key.
- Mouth-to-Lung (MTL): This is a two-step process, similar to smoking a traditional cigarette. First, draw the vapor into your mouth, then inhale it into your lungs. MTL devices typically have a tighter draw.
- Direct-to-Lung (DTL): This is a single, deep inhale, like taking a breath from a snorkel. Draw the vapor directly into your lungs. DTL devices produce larger clouds and have a much airier draw.
Check your device’s specifications to see which style it supports. Many beginner-friendly Smovape kits are designed for the familiar MTL style.
Choosing Your First E-Liquid: A Pairing Guide
The right e-liquid makes all the difference. For most beginner Smovape devices, especially MTL kits, an e-liquid with a 50/50 PG/VG ratio is a perfect start. This provides a good balance of flavor, throat hit, and vapor.
Nicotine strength is a personal choice. Strengths typically range from 3mg/mL (low) to 20mg/mL (high, often in nicotine salt form). A good starting point depends on previous smoking habits. The team at Smovape.com can offer guidance based on individual needs.
Daily Maintenance: Keeping Your Smovape Happy
A little care goes a long way. These simple habits will keep your device performing its best and extend its life.
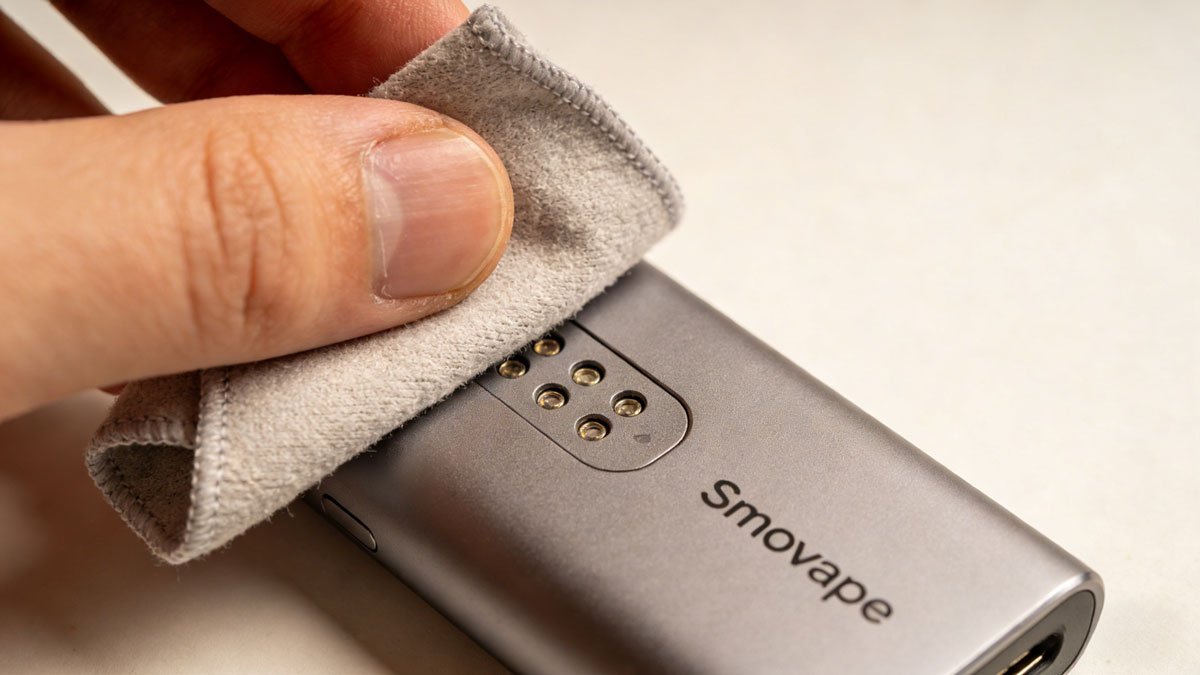
How to Clean Your Device
Periodically, remove the pod and use a cotton swab or paper towel to wipe the connection area on the battery. This removes any condensation or minor e-liquid buildup, ensuring a solid connection.
When you change your coil, it is a good time to rinse the pod (not the coil!) with warm water and let it dry completely before reassembling.
When to Replace Your Coil or Pod
Coils are consumable and do not last forever. An average coil lasts 1-2 weeks. You will know it is time for a fresh one when you notice:
- A burnt or “off” taste.
- Significantly less vapor production.
- The device is gurgling or leaking more than usual.
You can find a wide selection of replacement coils and pods on our website.
Battery Safety and Proper Storage
Always use the charging cable that came with your device. Avoid leaving it to charge overnight or unattended. Store your device in a cool, dry place away from direct sunlight and extreme temperatures.
According to the U.S. Food & Drug Administration (FDA), it’s important to follow manufacturer instructions for charging to prevent issues. Turn the device off when not in use to prevent accidental firing.
Troubleshooting Common Beginner Issues
Hit a snag? Do not worry, it happens to everyone. Here are quick solutions to the most common problems new users face.
Problem: My Smovape is Leaking
Leaking is an annoyance with a simple fix. The main causes are overfilling the pod, a poorly seated coil, or a coil that needs replacing. Try re-seating the coil firmly and avoid filling the pod to the very top.
Problem: It Tastes Burnt (A ‘Dry Hit’)
This dreaded taste almost always means the coil’s wick was not saturated. This can be caused by not priming the coil, low e-liquid levels, or vaping too frequently (“chain vaping”). If it happens, replace the coil and be sure to prime the new one properly.
Problem: My Smovape Isn’t Producing Vapor
If you press the button and nothing happens, check if the battery is dead. If it is charged, ensure the device is turned on (5 clicks). Finally, clean the connection points between the pod and device, as dirt can interrupt the power flow.
Problem: The Light is Blinking
A blinking light is your device’s way of communicating. While patterns vary, a blinking light usually indicates a low battery, a connection issue (no pod detected), or a safety feature like a short circuit. Consult your user manual for specific error codes.
Frequently Asked Questions (FAQ)
How long should I charge my Smovape for the first time?
It is recommended to give your new Smovape a full charge before its first use. This typically takes 60-90 minutes. Avoid charging it overnight to help preserve long-term battery health.
Can I use any e-liquid with my Smovape?
While versatile, Smovape devices perform best with specific e-liquids. For most beginner kits, a 50/50 PG/VG ratio is a great starting point. Check your device’s manual for specific recommendations. For more information, check out our blog for e-liquid guides.
How often will I need to buy new coils?
Coil lifespan depends on usage and e-liquid type. For an average user, a coil lasts from 1 to 2 weeks. You will know it is time for a change when the flavor fades or starts to taste burnt.
Ready to Start Your Smovape Journey?
You have the knowledge, now get the gear. Explore our curated collection of starter kits, e-liquids, and accessories perfect for beginners.
Shop Starter Kits →